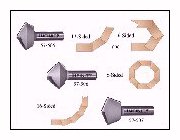
Spiral stair construction jigs.
|
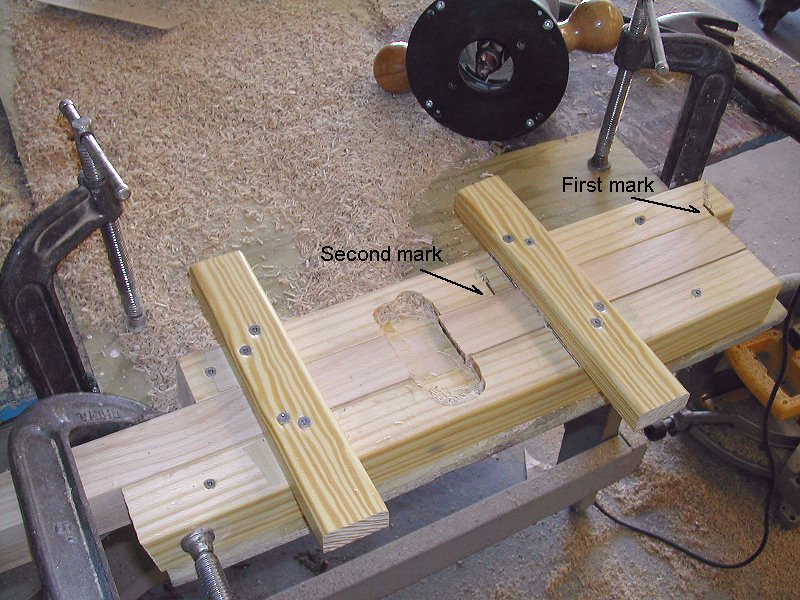
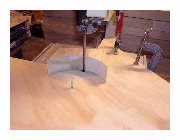
 Using this jig to make the baluster notches is about as accurate as I can
do. The bridges are spaced using the width of your router base added to the thickness of
your treads. Do a test or two before routing all your notches. The baluster slips under
the two bridges until getting to the first mark, it's routed, then the baluster is
removed and flipped over and slid in to the second mark. The marks are your rise apart.
Be sure to use a clamp of some sort to hold the baluster firmly, it'll want to move
around during routing. Using this jig to make the baluster notches is about as accurate as I can
do. The bridges are spaced using the width of your router base added to the thickness of
your treads. Do a test or two before routing all your notches. The baluster slips under
the two bridges until getting to the first mark, it's routed, then the baluster is
removed and flipped over and slid in to the second mark. The marks are your rise apart.
Be sure to use a clamp of some sort to hold the baluster firmly, it'll want to move
around during routing. |
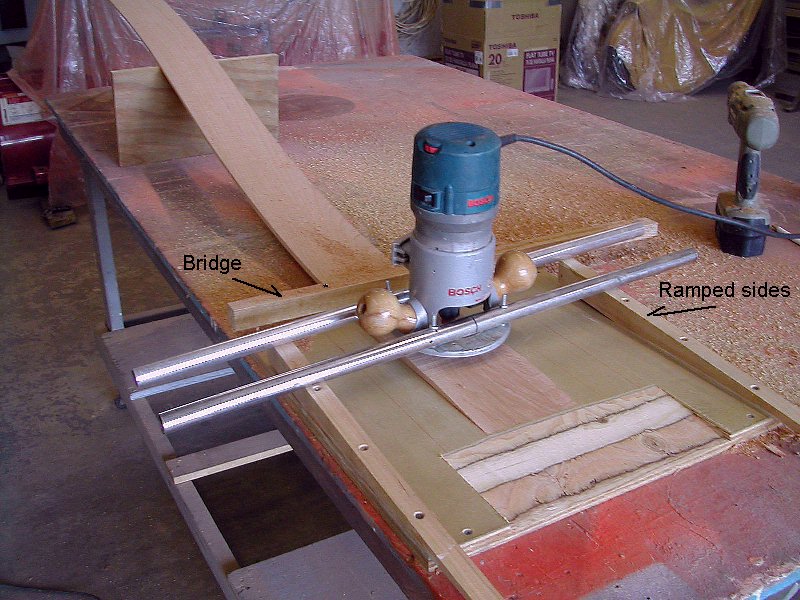
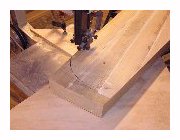
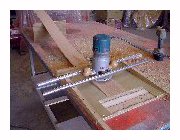 Here I've fastened a couple of pipes to my router so I can slide it along
the ramped edges of this jig. Along the back edge I've used a bridge to hold the wood
down. The bridge isn't tight down on the board as that tended to lift the end I wanted to
route. I used a piece of plywood under the free end of the board to pivot the board under
the bridge for stopping movement. This jig was used for building solid stringer material,
not for most of the spiral stairs pictured here. Here I've fastened a couple of pipes to my router so I can slide it along
the ramped edges of this jig. Along the back edge I've used a bridge to hold the wood
down. The bridge isn't tight down on the board as that tended to lift the end I wanted to
route. I used a piece of plywood under the free end of the board to pivot the board under
the bridge for stopping movement. This jig was used for building solid stringer material,
not for most of the spiral stairs pictured here. |
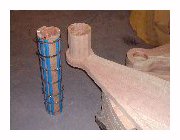 I've used wood for making the spacers between the treads several times and
found this router bit very useful. You can see how they look by following this link. I placed the 12 wood
slats face up and used tape to hold them in place for gluing. I then rolled the parts in
to a tube and used hose clamps around them until they dried. I've used wood for making the spacers between the treads several times and
found this router bit very useful. You can see how they look by following this link. I placed the 12 wood
slats face up and used tape to hold them in place for gluing. I then rolled the parts in
to a tube and used hose clamps around them until they dried. |
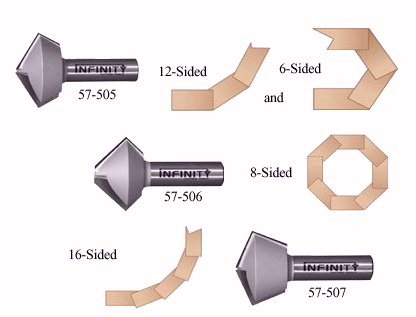
 I didn't try to make tube stock longer than just a few feet as I was going
to cut them later into short sections. You can find these bits at Infinitytools.com.
I use the 12 sided bit as these spirals usually have 12 treads to complete a full
revolution. I'll have to mention that I couldn't get the bit to make the cut in a single
pass, it's almost like the bit is made for thinner than 3/4 inch stock even though the
bits have 1/2 inch shanks. I didn't try to make tube stock longer than just a few feet as I was going
to cut them later into short sections. You can find these bits at Infinitytools.com.
I use the 12 sided bit as these spirals usually have 12 treads to complete a full
revolution. I'll have to mention that I couldn't get the bit to make the cut in a single
pass, it's almost like the bit is made for thinner than 3/4 inch stock even though the
bits have 1/2 inch shanks. |
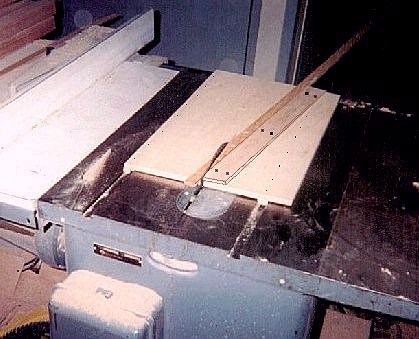
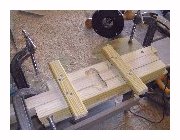
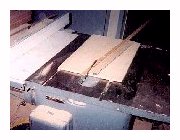 I use the table saw to scarf joint the handrail slats. I've put slim sticks
in the tables tracks then mounted a piece of plywood on them. I next attached a 1 by 3 or
so to the plywood on the angle I wanted for the slats. With the addition of a little
paste wax under the jig, it slides along very easily. I use the table saw to scarf joint the handrail slats. I've put slim sticks
in the tables tracks then mounted a piece of plywood on them. I next attached a 1 by 3 or
so to the plywood on the angle I wanted for the slats. With the addition of a little
paste wax under the jig, it slides along very easily. |
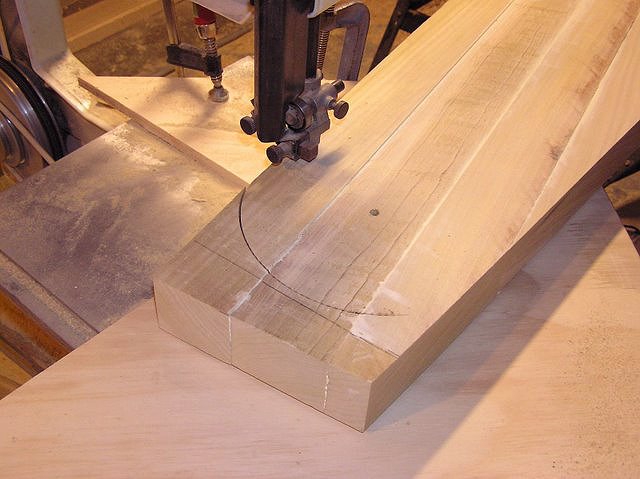
 An easier way to radius the small ends of the treads. An easier way to radius the small ends of the treads. |
 Much like the procedure for cutting the large radius on the tread ends. Somewhere along the line, I lost the name of the buider that sent me this idea. Much like the procedure for cutting the large radius on the tread ends. Somewhere along the line, I lost the name of the buider that sent me this idea. |
|
Contact me through this link. jim@jself.com
|