Johnny Vaillancourt JV
Builders
Hello Jim,
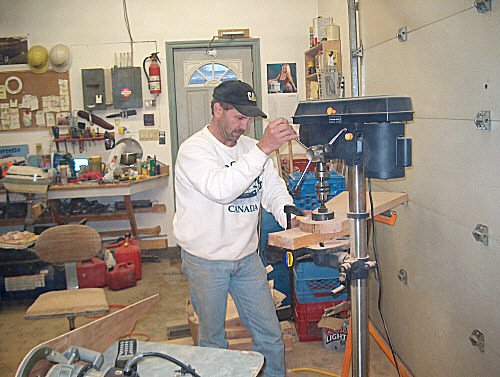
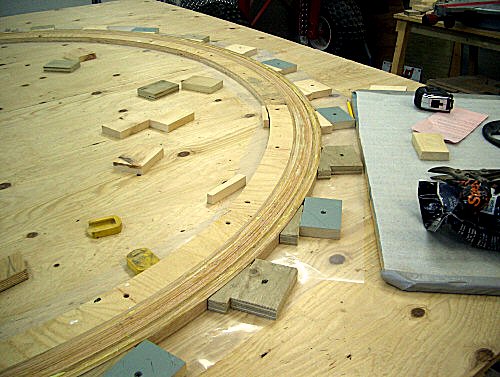
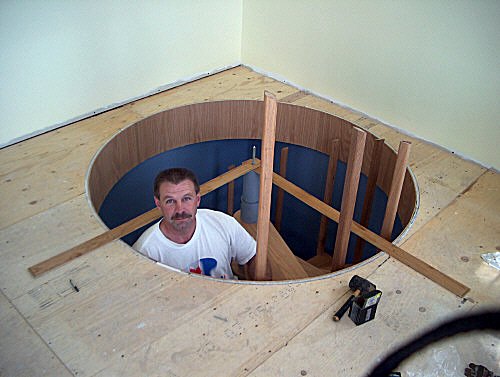
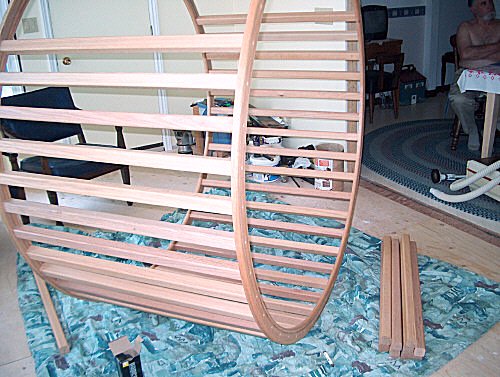
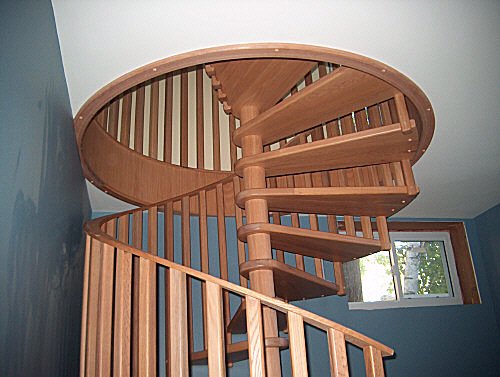
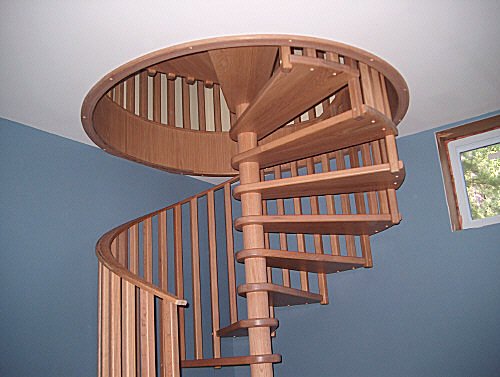
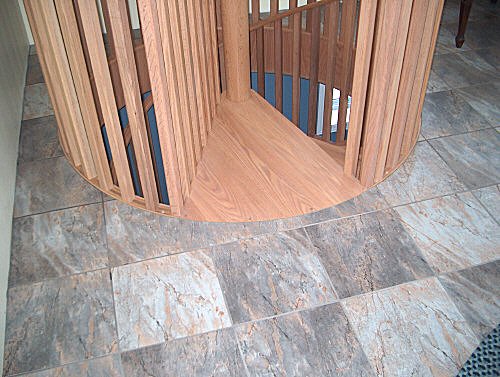
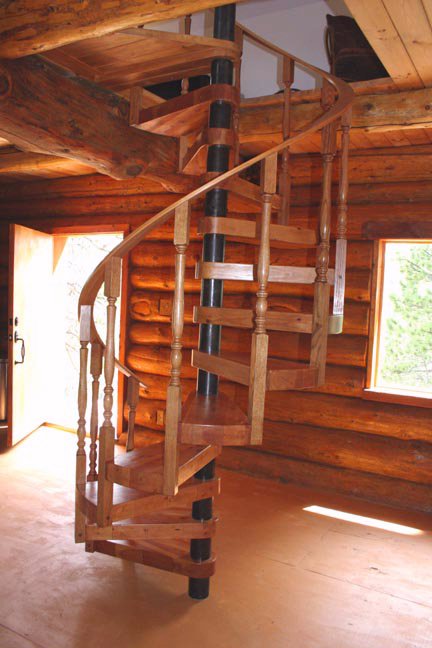
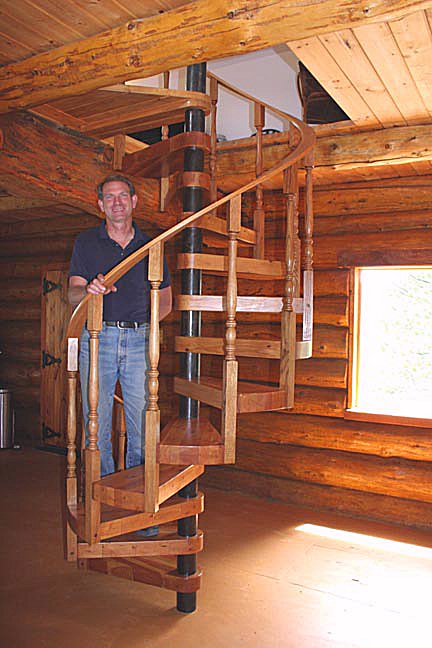
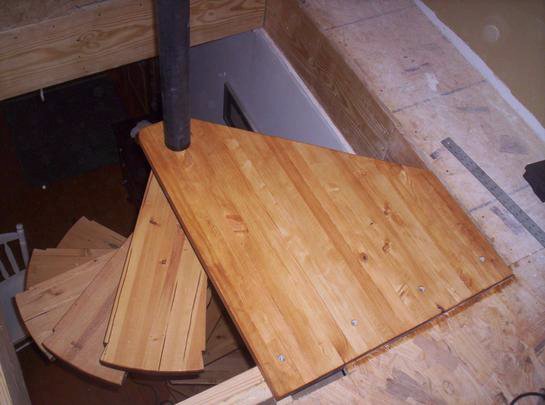
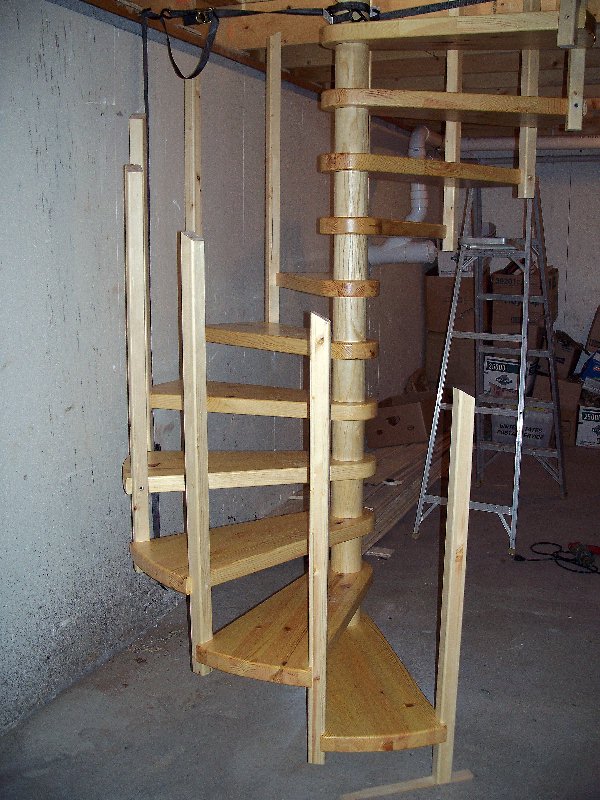
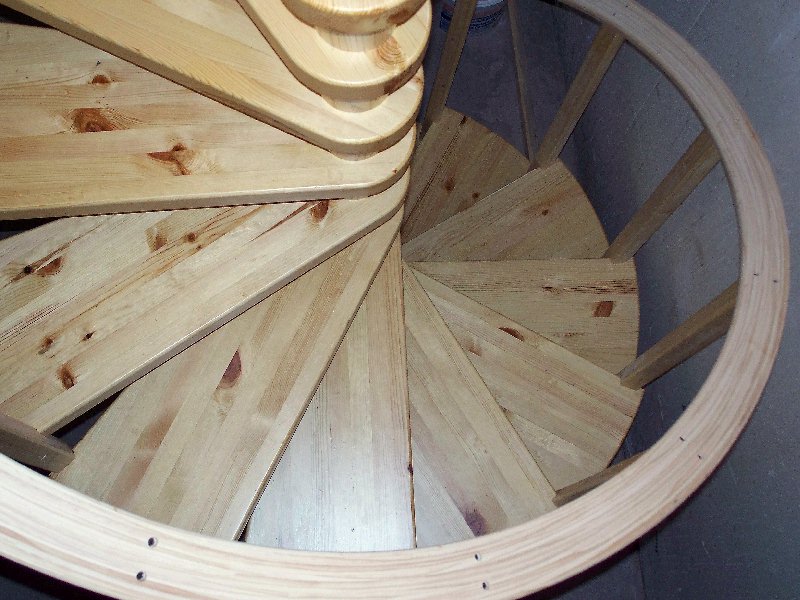
I've been meaning to send you pics of my first spiral for a long time. I bought
your plans in March or April 2005 because I had a request to build a spiral stair from a
good friend of mine (an 84 year old man). He had looked and searched all over for stairs
and they all wanted an arm and a leg for what he wanted. After having done a lot of work
at his house already, I guess he trusted my skills enough to ask me to build the stairs.
The only thing was, I never built that type of stairs before and I knew they were a heck
of a lot more complicated to build than regular straight stairs. That's when I purchased
your plans.
I studied all aspects a lot before I told Ron (my 84 Y.O.friend), that I would
attempt to build the stairs and that if I screwed them up I wouldn't charge him a cent.
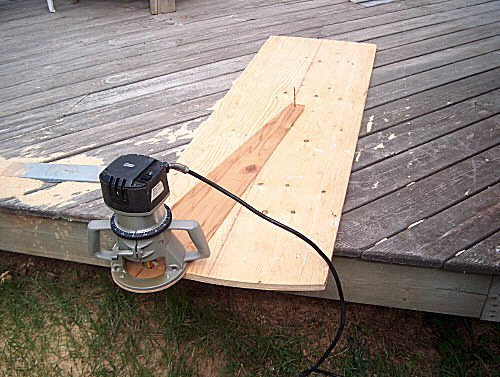
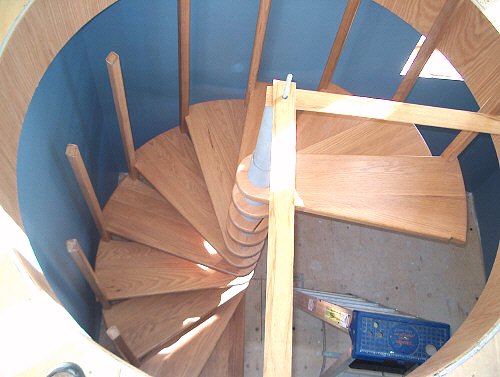
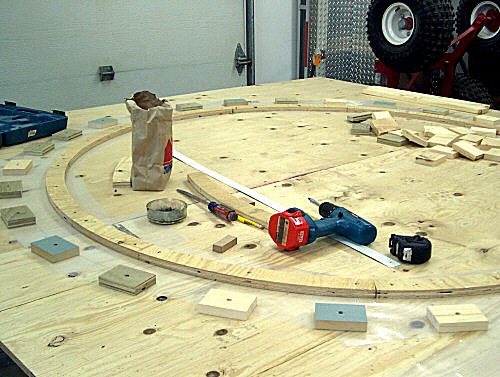
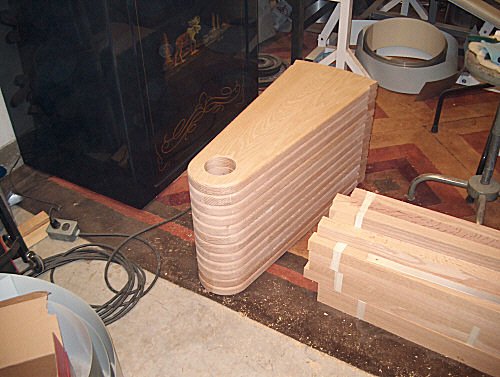
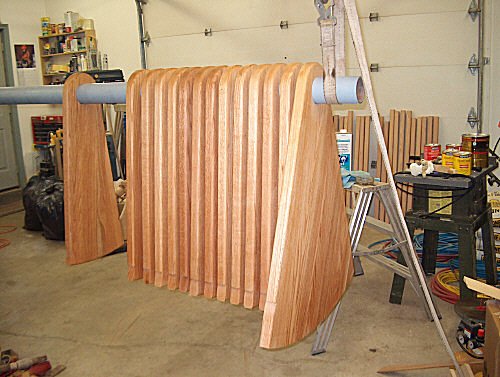
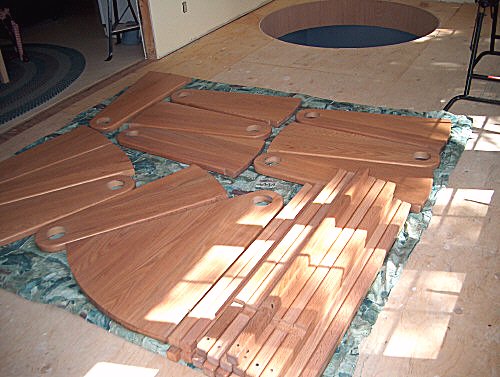
We got some solid oak and I started. I didn't have a band saw so I used a router to cut
both ends of the treads with some jigs I made out of 1/4" mahogany. The diameter of the
stair is 60". Thanks to your well detailed plans and pictures everything worked out
perfectly. It took me a while to build them but I bet I could cut the time in half if I
had to build another set. THANKS A MILLION JIM for your plans, They are well worth the
little money you charge. I would pay a lot more for plans that are so well explained and
detailed.
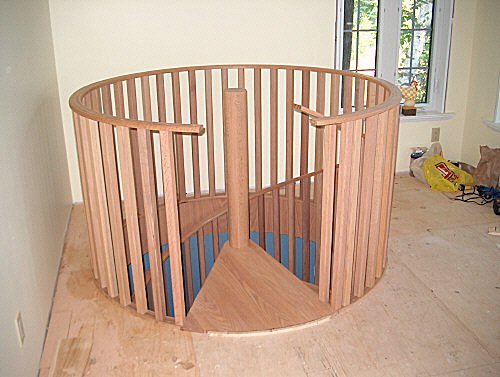
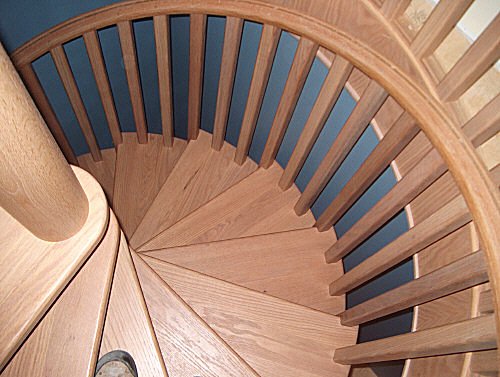
The owners are very pleased with the outcome.
Thanks again Jim, Johnny Vaillancourt, North Bay, Ontario,Canada
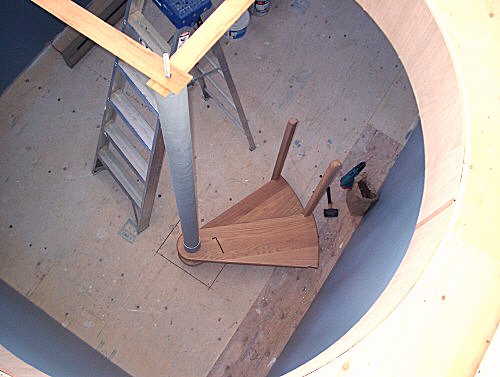
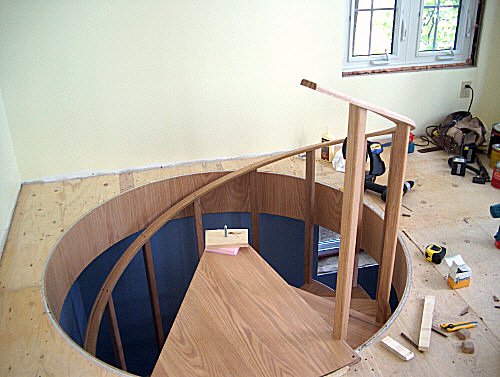
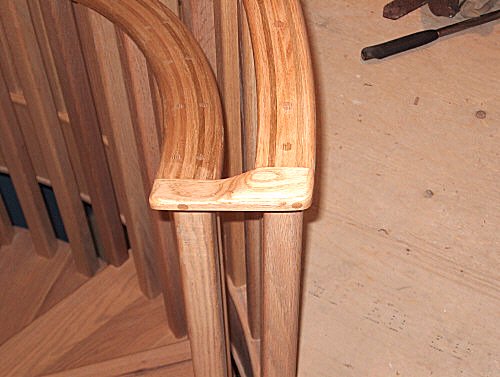
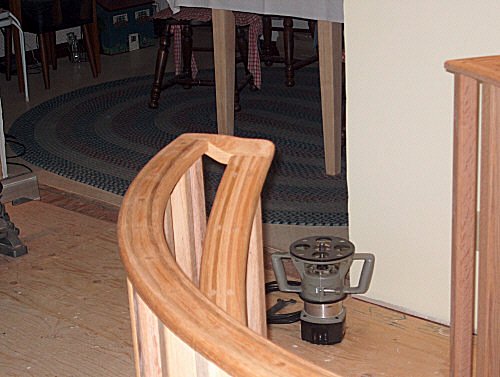
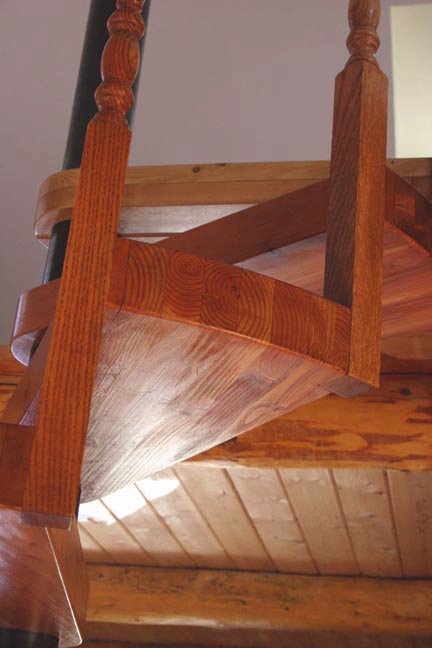
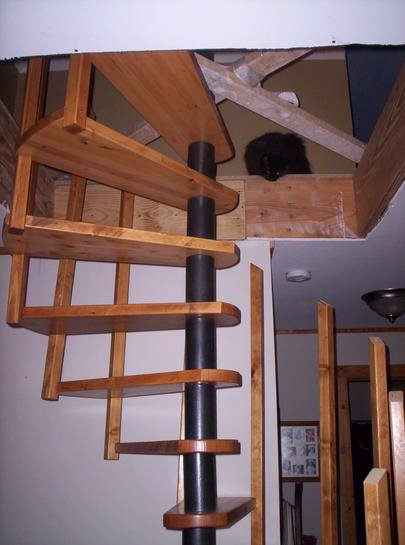
I especially like the piece that Johnny placed between the upper handrail end and
the handrail around the floor hole.
|
Click the small images for the bigger ones.
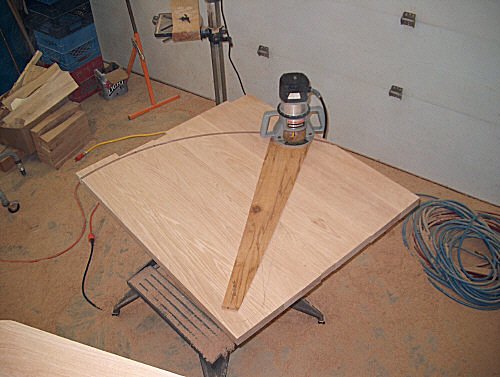
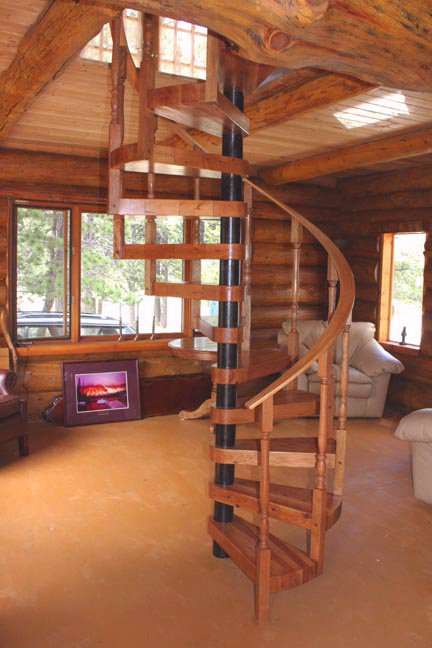
Julie York
Hi Jim,
It's been a couple of years since I ordered stair plans, but we finally finished
the stairs, or almost, I still need to install the upstairs guardrail... handrail?
whatever it's called.
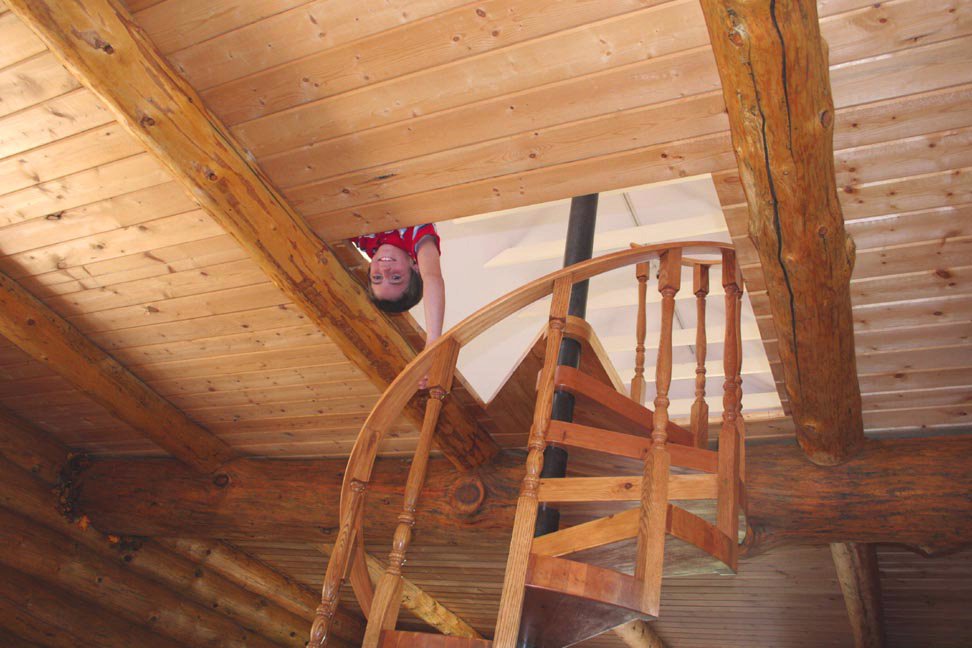
I love the stairs, they're in my little mountain cabin. They're quite small, just
47 inches in diameter. For me however they are perfect sized and very comfortable to
climb. You are so right about how solid they feel, there isn't a wiggle or a jiggle
anywhere. I know they're strong.
We made the staircase out of a mixture of different kinds of wood. The balusters
are red oak. The handrail is just pine. The treads are made out of 3 inch thick glue-lam
fir. I wanted the treads to be extra thick because everything at the cabin is made out of
large-scale things. Some of the logs are over 2 feet in diameter. The window sills are 3
inch thick solid fir, so the treads go quite well with the rest of the building. I was
surprised how well the different woods blended with each other once the stain and sealer
was on. There are some black iron accents here and there at the cabin, so I chose to
leave the spacer pipe black too.
I'm sending some photos of the stairs and also of my cousin Lynn Fischer and his
friend Mary working. They did most all of the building, I just helped a little here and
there. I don't have a picture of myself with the stairs right now. I'll have someone take
one someday, and send it along to you.
This was quite a learning experience for all of us. Each step of the way was a
little more complicated than one would imagine. I'm glad we had the plans! You'd have to
ask Lynn if he'd ever be willing to build another one... In any case, everyone who sees
the stairs raves about them.
Thanks again!
|
Click the small images for the bigger ones.
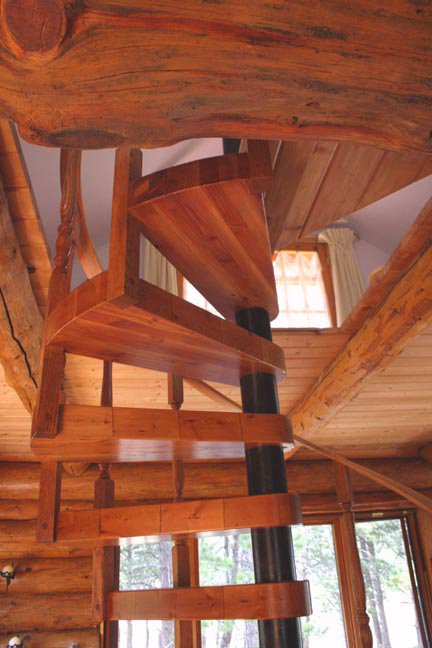
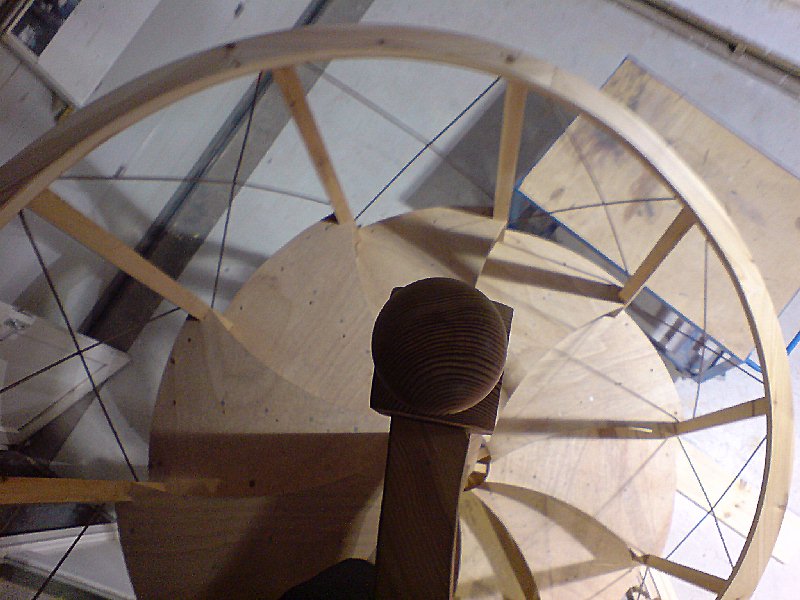
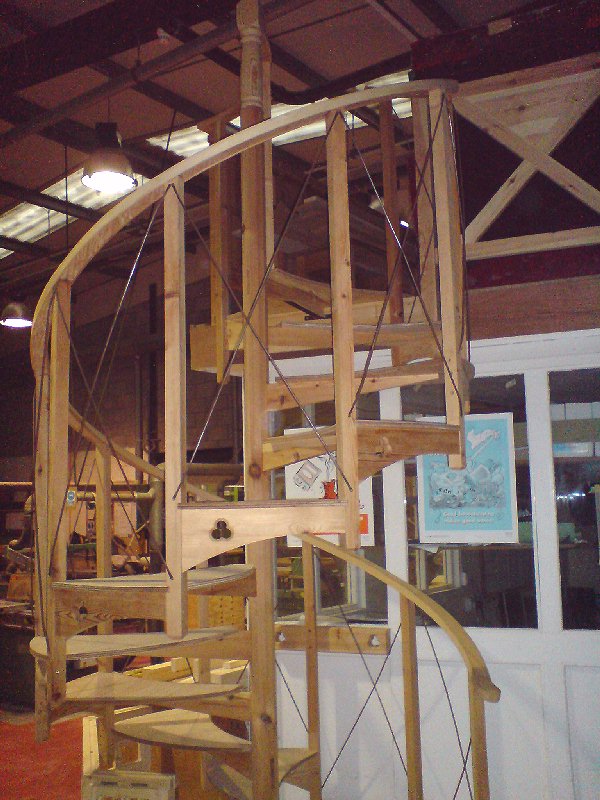
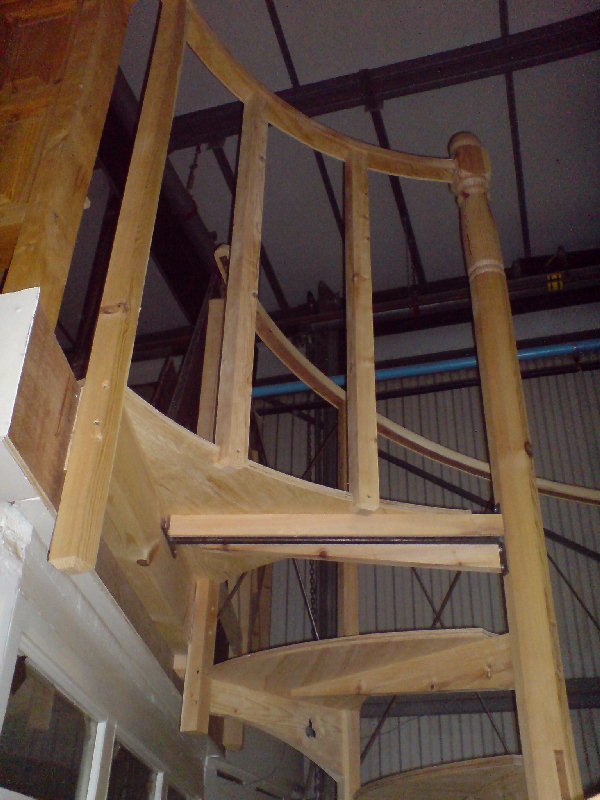
James Rawnsley
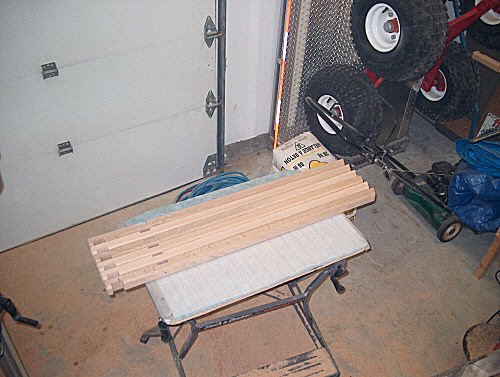
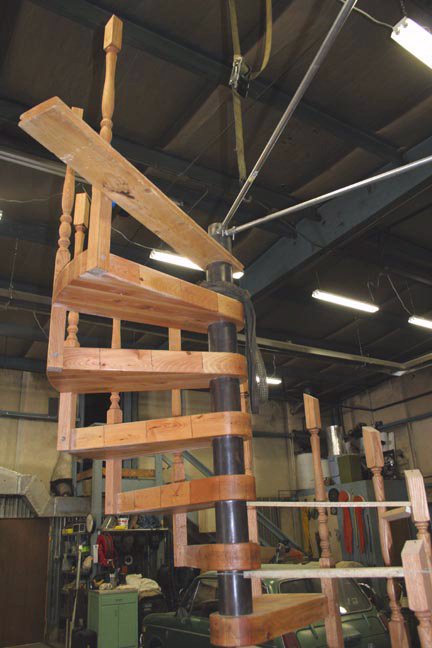
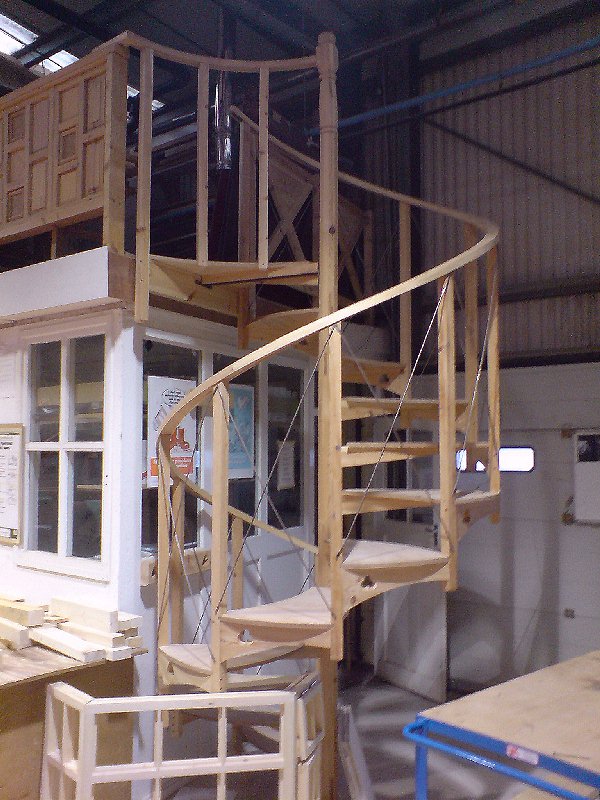
My first and second year apprentices needed an extension project and a 10 tread to
the turn spiral was thought of, (an eleven would have given more head room. A solid
center newel with polygonal sides was used with brackets. Extra stability came from the
fancy brackets and fabricated cross wire infill to the balusters. All treads are curved
on plan and this makes the thing seem high at the hand rail giving a feeling of security
when you walk it (unexpected)
Not bad for a prototype!!
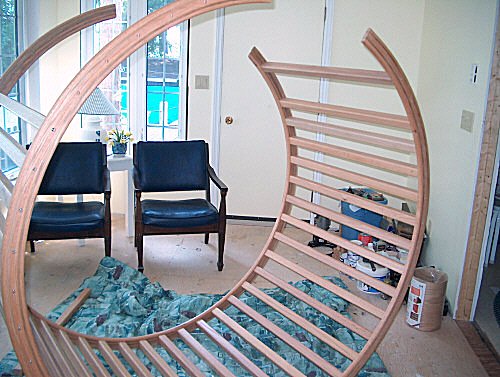
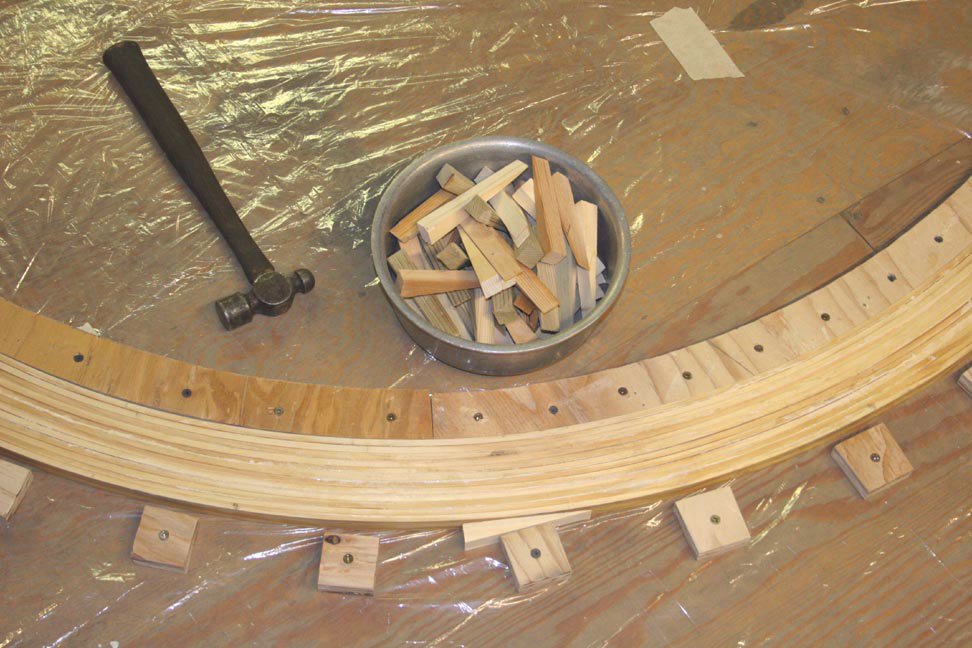
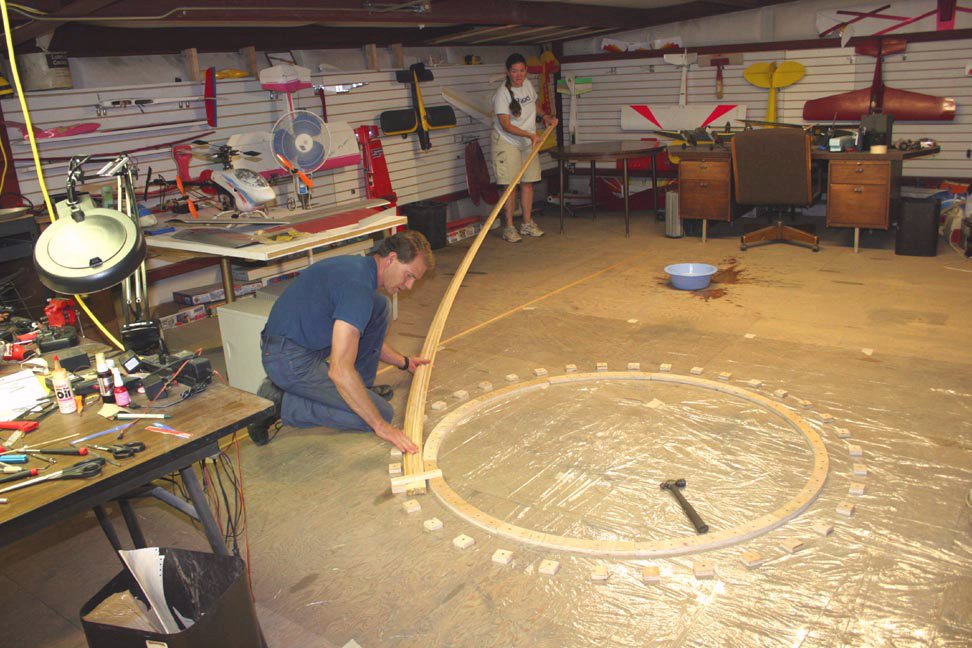
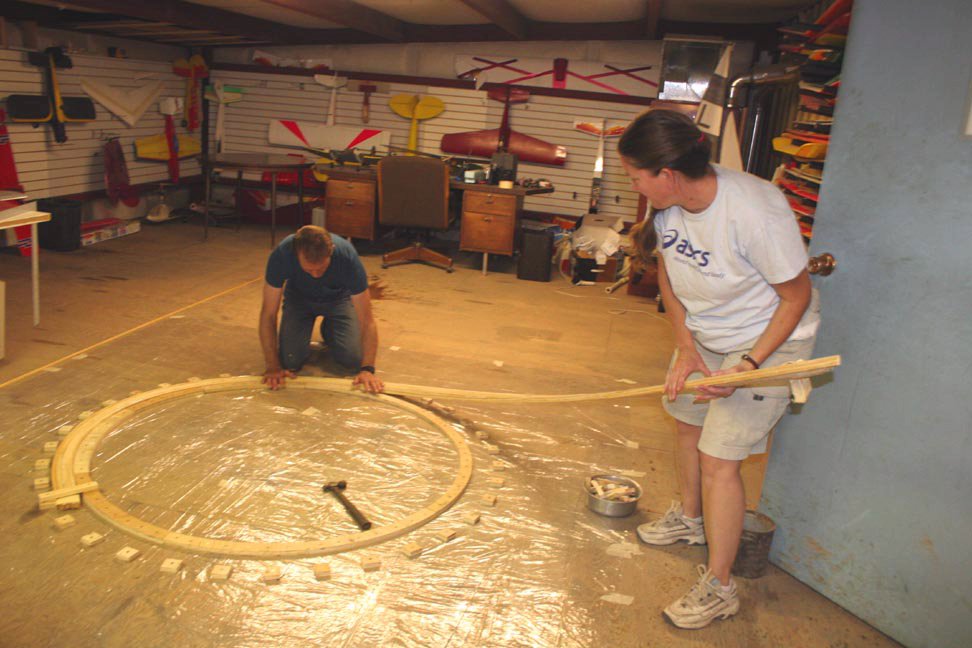
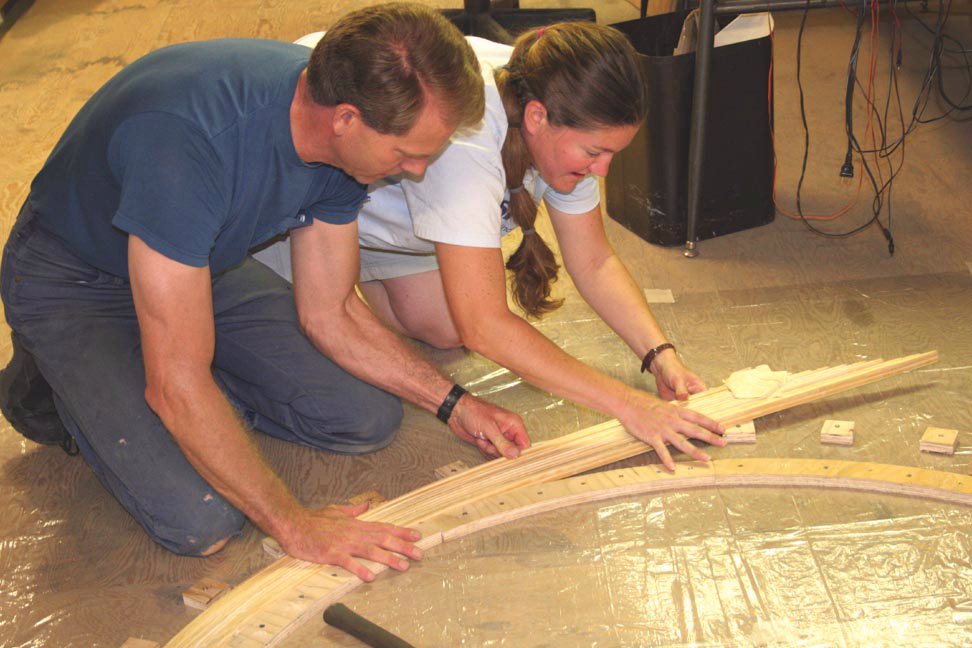
The handrail was laminated in situ with layers of thin birch ply bent to top cuts
of balusters and held with a long elastic made from car inner tubes wrapped around. C
section softwood lippings were applied to plywood sides and held with bands till dry.
Shaped 4mm thick softwood caps were bent to the top of the handrail (in twist) to give
the appearance of solid wood. A small shaped volute was put top and bottom in solid to
finish the job.
It is for testing out theory only and will never be fit. Unless some one wants it
when we move buildings next year!
|
Click the small images for the bigger ones.
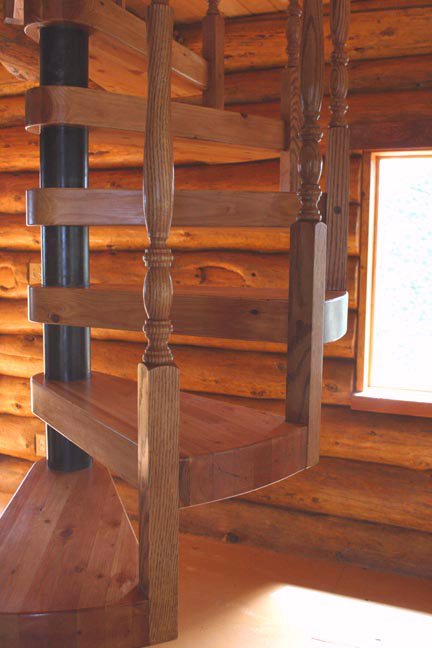
Tim and Amy
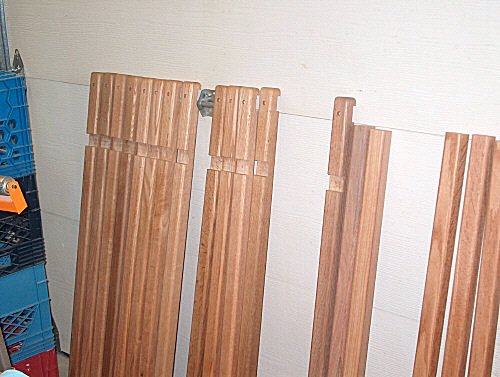
The handrail broke when I tried to bend it to the balusters. Have you had this
happen before?.......Got any ideas on what I did wrong? The thickness was 1 1/16
inches.........
Tim
Sorry to read you had a failure of something that takes so long to build. I do
think the thickness did you in. I've had problems whan I made them 7/8 before, not
breaking but being hard to twist on the ends that the screws were pulling out of the
balusters.
Can you save any of the old railing or do you have to start over again?
Jim
Ok thanks for the input. I am starting again. Thank God I saved the form that I
built the first one with. That is ok because that was my first try and I think there are
a few things I will do a little different. Yea it is a major setback but I want it right
so here I go again. I may think of something to do with the other one, maybe around a
mirror or something. No good piece of wood goes to waste!
If the uprights look funny it is because I was using just small wood screws to get
an idea where the landing would end up.
|
Click the small images for the bigger ones.
Alan Unger
Everything went together well according to your plans. The handrail cracked a
little at the top. But looks like it can be filled and sanded to look like it was never
there. That was quite the harrowing experience twisting it into place, I had my doubts
about it fitting. I have some tweaking to do on the balusters but overall I am very happy
with the way it turned out and look forward to showing it off in my camp to many
visitors.
AL
Your mentioning the handrail cracking has me curious. Did the twister stick slip
sideways, was its cut out too wide and only grabbed the edges of the rail, or...? I've
only cracked them when I did something wrong. One of them I fixed by opening the crack
for glue and then shooting a screw through it sideways. It's damn rare for them to go
wrong though, that's why the curiosity.
Jim
As for the cracked hand rail, the twister stick split apart on me so I had a
momentarily stupid thought and used a C-clamp with wood clamped between, guess what, it
does not work as well as the twister stick. The crack did not go all the way through, so
things will work out fine.
I had my uncle help me out with this project, he has made some pretty remarkable
projects in the past, like a full restoration of a 1941 Chris craft barrel back boat, and
is currently restoring a world war 2 glider that ford motor once produced in our town of
Kingsford, Michigan, just to name a few. It is a good thing he helped, very knowledgeable
man. We used ash veneer for the spacers and handrail.
As for my friends, they are impressed. I'm excited for my brother to see it, he has
no idea it is installed in our camp.
|
Click the small images for the bigger ones.
|